|
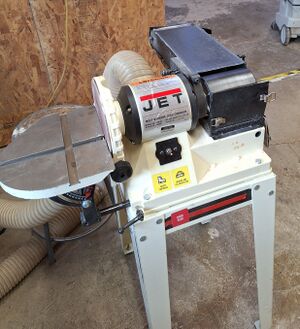
You will be working in the Woodworking Sanding Room . In order to keep safe from hazards created by you or other workers using any of the tools in this room, the following precautions apply in addition to any other precautions:
Safety
Hazards
- Dust
- Noise
- Projectile (materials being thrown)
- Laceration (sharp edges created by workpiece)
- Entanglement (spinning parts sucking user into equipment)
- Fire (overfilling dust collector, trying to cut with dull tooling))
PPE
- Hearing Protection
- Respiratory protection (minimum N95 mask; respirator preferred)
- Safety Glasses
- Safety shoes
Tie back or remove loose hair, clothing, jewelry, etc.
Precautions
Do
- Read the Safe Work Procedure and obtain North Forge approval before using the equipment for the first time.
- Maintain a calm but vigilant attitude. If you are stressed or in a hurry, it’s best not to use the equipment.
- Tie back long hair and jewelry; remove earbuds and hoodie cords.
- Check the workspace for slip and trip hazards.
- Ensure the equipment is in good condition (hoses and power cords in good condition, no clogs in dust extraction hoses).
- Inspect the material for cracks, knots, or debris before starting - material can shatter or kick back if it is not stable.
- Check the equipment for trapped debris when done.
- Use a brush and/or vacuum to clean most of the dust before finishing with compressed air.
Do not
- Use the equipment if you are tired, intoxicated, or otherwise impaired
- Rush
- Distract operators - if you need to get someone’s attention, stand to the side and wait until they notice you. Do not wave, shout, or touch the operator.
- Leave the equipment with equipment still running - note that hearing protection can prevent users from hearing when the equipment is/is not running.
- Sand metal due to risk of sparks and equipment/property damage.
Housekeeping
- Check the working area for slip and trip hazards (sawdust, oil, offcuts) before and after working
- Do not leave air hoses or extension cords laying across walkways where people can trip on them
- Check hoses for excess sawdust or other clogs
- Empty the dust collector if it is filled to more than halfway up the viewing window (~1 garbage bag worth of dust)
- Empty waste bins if they are more than 75% full
- Bag waste should be less than 6x6”
- Blunt any sharp corners that could puncture the bag
- Replace waste bags after emptying
- Firewood bins are only for untreated wood with no paints or stains
- Return all fab lab tools to their proper locations
- Remove all personal tools, materials, and equipment from the room
- Fire code prohibits storing material in the wood room
- Turn off the equipment and dust collector.
- Turn off the room exhaust if you are the last one in the room.
- Room exhaust is interlocked with equipment power; turning off the exhaust will turn off all equipment in the room!
|
